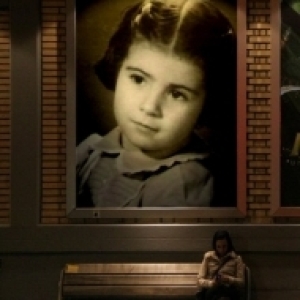
in the darkroom...
The invention of the digital camera has made it possible to take photographs without having to develop them in a darkroom...
Developing film
Exposed film must be in complete darkness when being developed. Developing chemicals are used in the following manner. The first tank contains developer which changes the latent image on the film from silver salts back to metallic silver. The second tank is a stop bath, which is a weak acetic acid that stops the action of the developer. The third chemical is a fixer solution which removes the underdeveloped silver salts and cleans the film. It hardens the black silver image left on the negative. The photo flow solution is a wetting agent that prevents water spotting on the negative. After use, the developing tank and reels must be thoroughly washed. The negatives are washed in water for 4 to 5 minutes and then hung to dry.
Contact Prints
Make contact prints by putting the negatives directly on the photo paper. Contact prints are pictures the exact same size as the negatives, and are all developed on one piece of photo paper.
This is done in order to determine which negative is best.
Contact prints require the use of photographic paper so they can be made in the darkroom under the safelight, which does not affect photographic paper. To make contact prints, set the enlarger f-stop for a wide setting, place the negatives on a piece of photographic paper and put a clear sheet on top of them. When using photographic paper, the glossy side faces up. Use the timer on the enlarger for exposure time of about 30 seconds.
Put the photographic paper in the developing chemicals, first the developer, then the stop bath and then the fixer. When the paper is in the fixer, regular white light can be turned on. Look at the results and select a negative to be developed.
Test Print
The next step is to make a test print of the negative chosen. Put the strip of negatives containing the desired negative into the slot of the enlarger. See the example to the left. Turn the knob so that the correct negative appears in front of the lens. The aperture of the enlarger is opened all the way, and the image is focused and moved around. The image that is generated must have decisions made about it. Such things as how large the picture will be and can any portion of it be cropped or cut out, need to be addressed by the student before proceeding.
The aperture on the enlarger must be reset so that the amount of light is drastically reduced.
Once this has been arranged, the test strip can be produced. Turn off the regular light and work from the safe light. Take a piece of photographic paper out and put it on the easel. Set the timer for at least 15 seconds, and place a cover paper over 2/3 of the photographic paper. As the time progresses, shift the cover paper at least twice. That will cause strips of the image to have different exposure times, as shown in the example to the left. The image to the left had exposure times of 5, 10 and 15 seconds. (Remember, we are talking enlarger times, not camera times.)
Develop the test strip as you did the contact print. The correct exposure time will be realized by looking at the test strip print.
Final Picture
The photograph itself can now be exposed and then developed.
simple really... and you (yes, you!!) moan if it takes more than 30 seconds to upload ...
nostalgia #2
nostalgia #1
- 0
- 0
- Nikon COOLPIX S570
- 1/100
- f/2.7
- 5mm
- 400

Comments
Sign in or get an account to comment.


